If you write Java, sooner or later you need to set JAVA_HOME. It’s one of those basic things every Java developer ends up doing. Let me walk you through it on Windows 10, one click at a time.
Open the environment variables
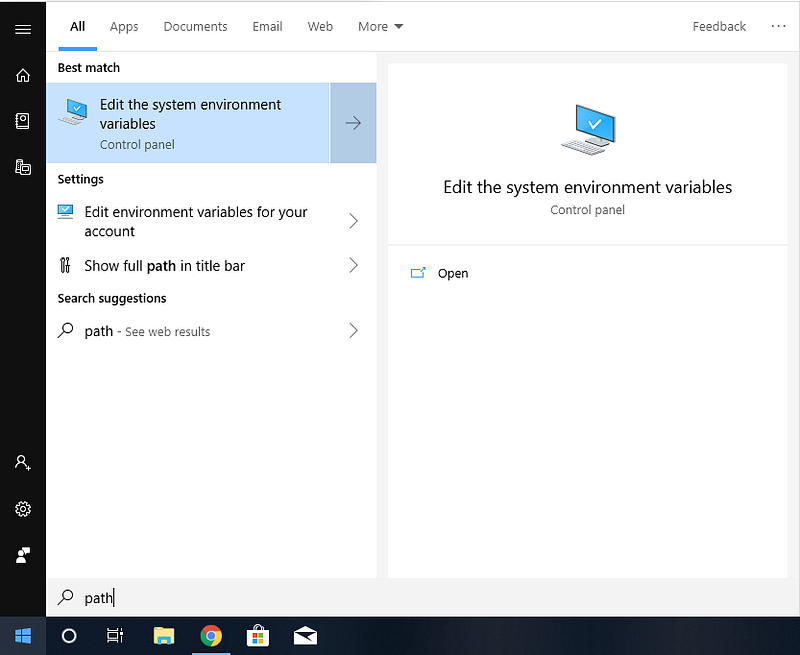
Search for path and open the Edit the system environment variables app.
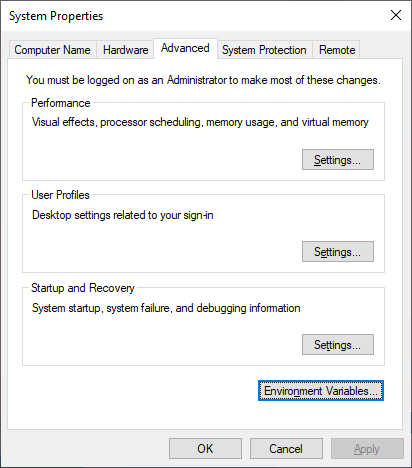
Then click the Environment Variables… button.
Create the JAVA_HOME variable
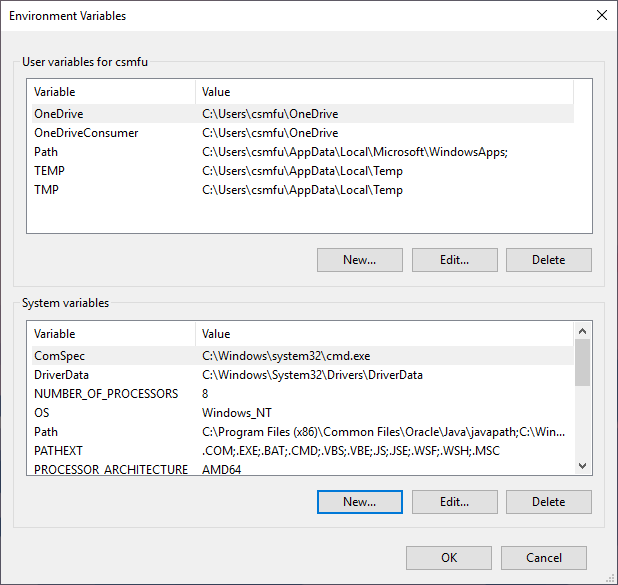
In the System variables section, click New….
Now fill in the details:
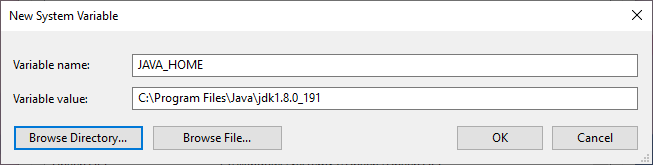
- Variable name:
JAVA_HOME - Variable value: click
Browse Directory…and pick your Java Development Kit (JDK) folder. - Click
OK.
Add JAVA_HOME to your Path
Back in the list, select Path and click Edit….
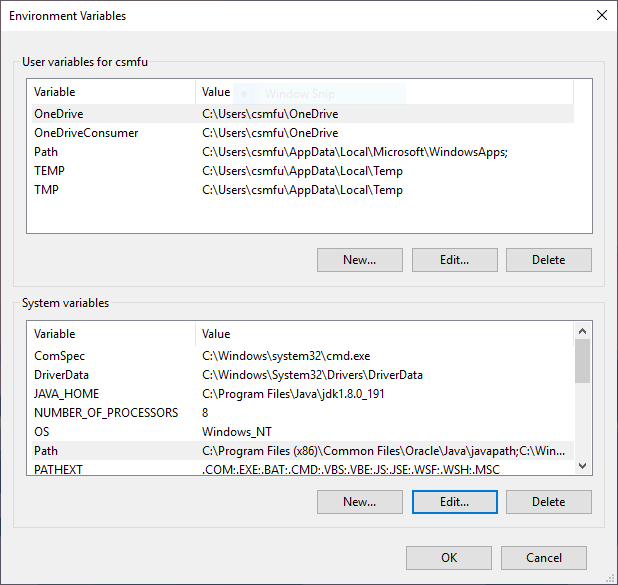
The Edit environment variable window pops up.
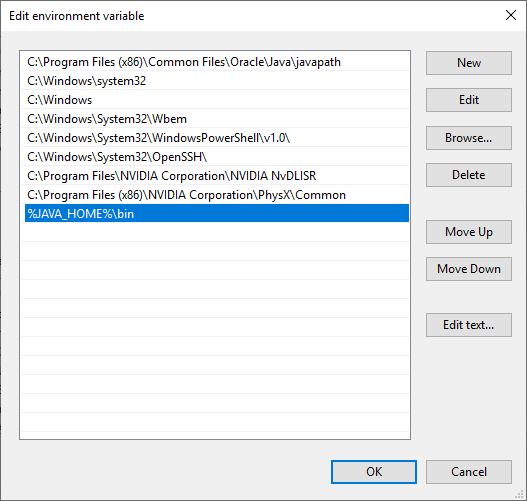
Click New, type %JAVA_HOME%\bin, and click OK. Then click OK again to close the Environment Variables window, and one more OK to close System Properties.
Check that JAVA_HOME is set
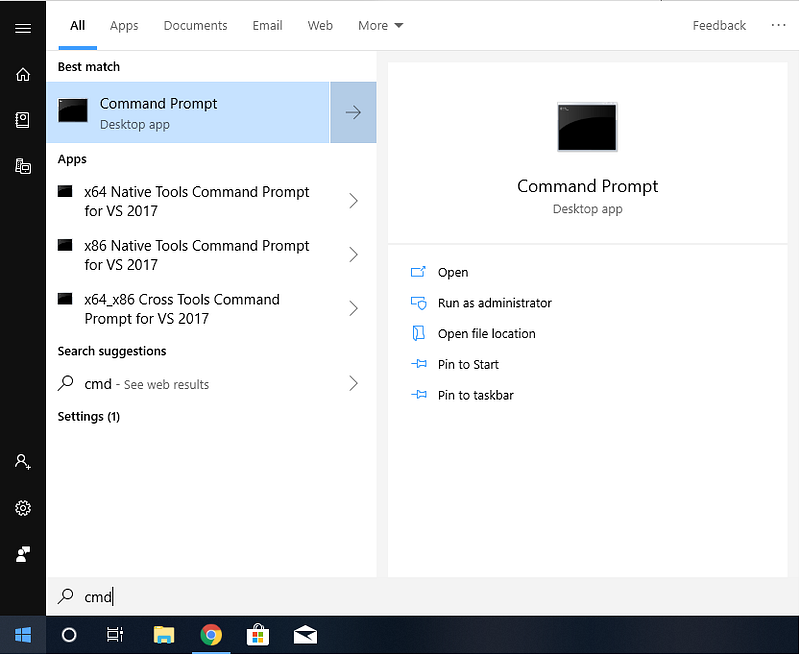
Search for cmd and open the Command Prompt app.
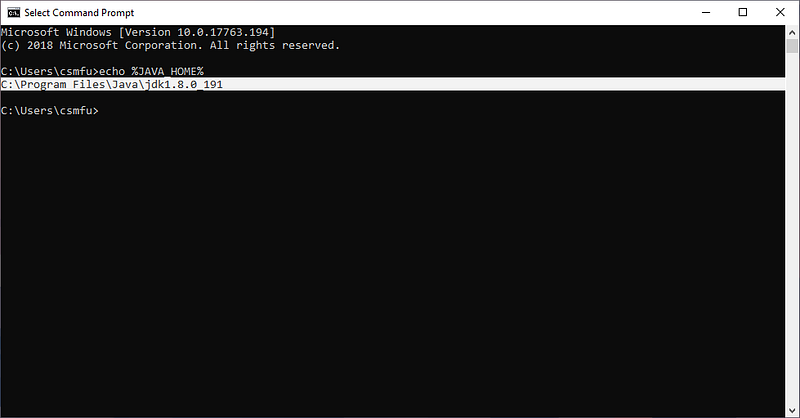
Type echo %JAVA_HOME% and hit Enter. It should print the JDK path you picked earlier.
Check java and javac too
While you’re here, let’s confirm Java and the Java compiler work.
Type java -version and hit Enter, then javac -version and hit Enter. You’ll see the Java version, build number, and compiler version.
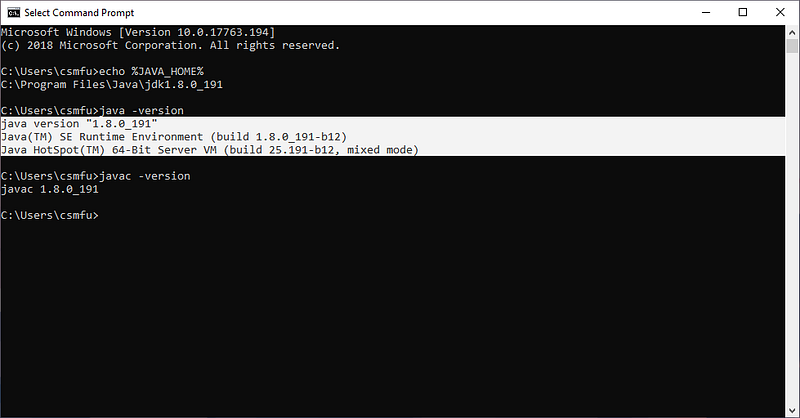
That’s it! Your computer is ready for Java. Let’s rock!